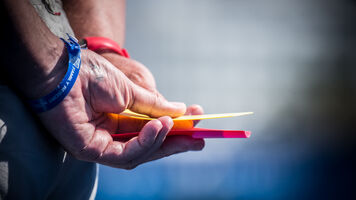
With the outdoor season in full swing, many archers – particularly recurve archers – on the field can be seen shooting with some kind of spin fletching.
Spin vanes differ from the traditional feathers or plastic fletch because of their curved profile. These vanes work by making the arrow spin in flight. This increases drag, but the rotating effect stabilises the arrow, making it potentially more accurate.
Spin vanes are very easy to attach to your arrows, and since you don’t need to use glue, they can be shot straight away without waiting for adhesives to dry.
Vanes come in a variety of brands, shapes, sizes and thicknesses, each suitable for different scenarios and archers, so they are incredibly versatile.
Gear

To fletch your arrows, you will need:
- 1 x pack of spin vanes
- 1 x pack fletching tape
- 1 x pack lining tape
- arrow shafts
- fletching jig
- pencil
- scissors
Prep
Before starting to fletch, prepare the bare shafts by wiping and cleaning. Make sure they are dust and grime-free, as it helps the adhesive strips bind properly.
If you have wraps for the arrows, roll them on now. If the wraps have pre-marked lines for fletching, you can skip the first step of this process.
Step 1

Measure one of the vanes, note down the length, and then place your arrow in the fletching jig.
STEP 2

Use a pencil to make three lines, the same length as the vane, starting at the same point, at equal spaces around the shaft.

STEP 3
Unlike with normal plastic vanes, fletching tape can be used to attach a vane to an arrow quickly. This makes spin vanes much easier to repair when you’re on the range or in a competition.
The tape provided may be much longer than your vanes. Cut the sheet of tape to the same length as your vanes before applying.

Take a piece of the double-sided fletching tape and place it along one side of the line you marked on the arrow. This is the most fiddly part, but make sure it’s straight along the line.
(With the point facing away from you, put the tape on the right side of the line if you’re a right-handed archer, on the left if you’re left-handed.)
Attach the other two pieces of tape, ensuring all three pieces are on the same side of the lines – you want to keep the tape equally spaced around the shaft.
STEP 4
Peel off the top layer of one piece of tape.
STEP 5

Clamp one of your vanes and line the straight edge up on the edge of the tape (and the pencil line). Place it on the shaft, and when you’re happy with the placement, press it down gently.
STEP 6

Repeat process with the other two vanes.
STEP 7

Although the vanes are now stuck on, they are still quite fragile.
Take the lining tape and cut it to length. You’ll want to wrap it around the arrow a couple of times, but no more, otherwise you’ll add unnecessary bulk.
STEP 8

Place the tape between two of the vanes. The idea is to wrap the tape around the arrow to trap the ends of the vanes, covering a couple of millimetres, without constricting their shape.
Wrap the tape following the direction of the vanes.
(For right-handed spin vanes, that’s anti-clockwise; clockwise for left-handed.)
STEP 9

Press down the excess, and wrap the other end of the vane…
…and you’re ready to shoot! (After fletching the rest of the set, that is.)
Top tip
Pro Canadian archer Crispin Duenas has an excellent tip for finishing your arrows after you’ve fletched with spin vanes, in the video at the top of this page. Wipe talcum powder across the vanes, and any exposed tape – and it will stop the arrows sticking together in your quiver.